NI TestStand is software for running test sequences that automates many of the functions that are common to a piece of test software, such as user permission management, UUT data input, report generation, and database logging. However, in some cases the built-in TestStand functionality is either not specific enough or not required.
There are ways to override this behavior within TestStand itself, but it can be easier to implement your specific requirements using your own programming language of choice rather than learning the ins and outs of the TestStand API. Everything you can do in TestStand can be done with ActiveX API calls to the TestStand engine, and example operator interfaces are provided for C++, C#, CVI, LabVIEW, and VB.NET. TestStand projects typically use a special model sequence, either one of the built-in types (Sequential, Batch, or Parallel) or a modified version of one of the built-in sequence types that directs the general test flow from UUT data input, main sequence execution, through to report generation and displaying the overall result.
In this blog post, we’ll be discussing one of the methods that can be used to override TestStand functionality for a simplified user experience, UI Messages, and how to use them. You can follow along with our project example.

In a recent Genuen project, the design goal was to provide a simple operator interface for an end-of-line tester that would hide most of the complexity of the TestStand engine. The built-in user management or report generation was not needed, and database logging was done through a custom cloud API from another vendor. Rather than trying to accomplish this within the TestStand sequential process model and overriding the database logging function, we chose to dispense with using a TestStand model entirely and performed a direct call to a single sequence and configured a LabVIEW operator interface to handle sequence setup and database logging. This operator interface was based on the Simple LabVIEW user interface example.
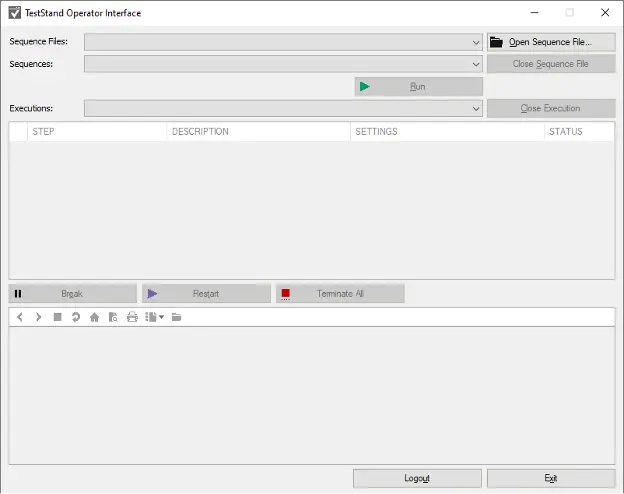
In order to accomplish this goal, two of TestStand’s more advanced features were used: UI Messages and custom step types with a Post-Step substep.
UI Messages are a method for getting your sequence file to talk to your operator interface through a callback and, optionally, to give your user interface the opportunity to talk back before the sequence proceeds to the next step. Since the custom step type depends on UI Messages for its function, let’s start with UI Messages.
From the TestStand side, the method is pretty straightforward:
-
With the adapter type set to ActiveX/COM, drop an Action step into your sequence.
-
Select NI TestStand (<Your version here>) API as the Automation Server.
-
Type in Thread as the Object Reference.
-
Choose Thread as the Object Class.
-
Select PostUIMessageEx as the Call Method.
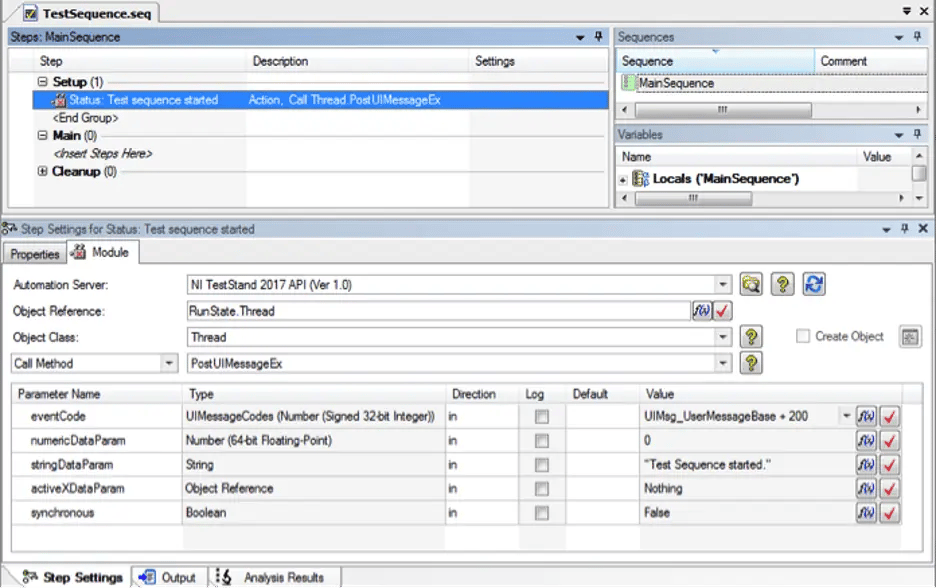
Custom UI Message Setup
In this example, we used the user message base number “+ 200” as a code to transmit a simple status message to the operator interface. So, under eventCode, you can type in UIMsg_UserMessageBase + xxx or simply use 10,000 as the lowest number when defining your custom messages. In this case, we sent the payload in the stringDataParam field. You can also pass a numeric value or an activeX object. If not using those, be sure to enter Nothing as the activeXDataParam. The synchronous field, when set to True, will pause the test sequence until your operator interface code is done processing the callback allowing, for example, the operator interface to populate sequence variables in TestStand.
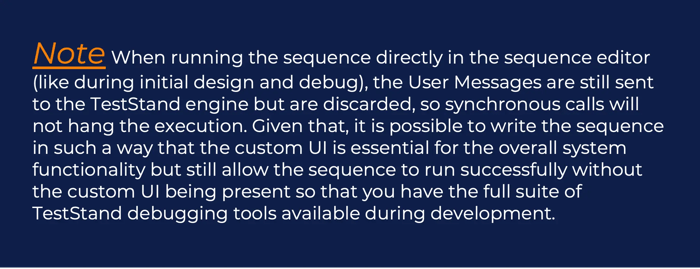
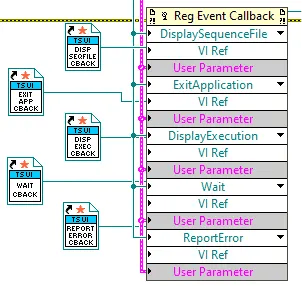
Event Callback
On the LabVIEW side, a new callback must be registered to process the UI Messages. In the simple UI, this is done in the Register Event Callbacks case of the TopLevel VI. (In the full featured UI, an operator interface that ships with TestStand, this can be done in the Configure Event Callbacks VI, but I am focusing on the simple UI here.):
-
In the Reg Event Callback node, expand the bottom of the node and select UserMessage from the event dropdown box.
-
Wire up the Application Manager wire and the UI Data wire the same way as the already-registered callbacks above.
-
Finally, right click on the VI Ref input and select Create Callback VI. This will automatically create the callback VI with the appropriate inputs and attach a static reference to that VI to the VI Ref input.
The block diagram will be completely empty except for the input controls. An example for handling the status message is shown below. The display error VI is from the example code while the StatusBar VI is one of our reuse library VI’s that updates a timestamped string indicator on the main front panel.
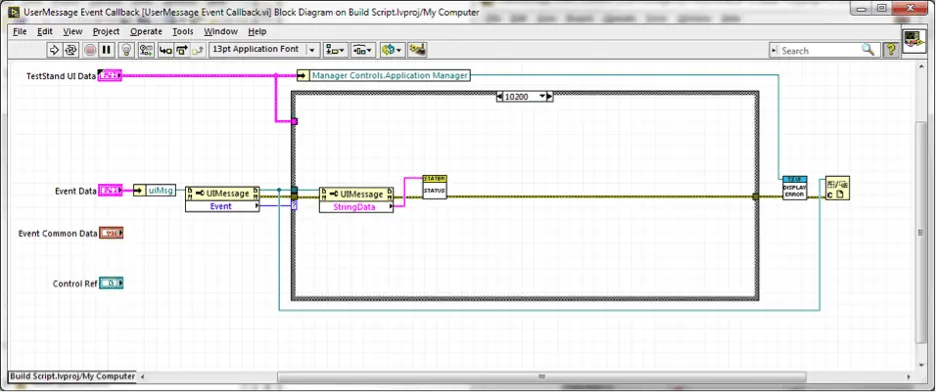
Status Message Example
A second status message example shows how to use the Thread object to get the SequenceContext and set variables back in the executing sequence. If the calling message from the sequence has synchronous set to True, the execution will wait for everything here to finish before proceeding. In the case below, we set FileGlobals.SerialNumber from a LabVIEW global variable populated by the operator interface before sequence execution even begins.
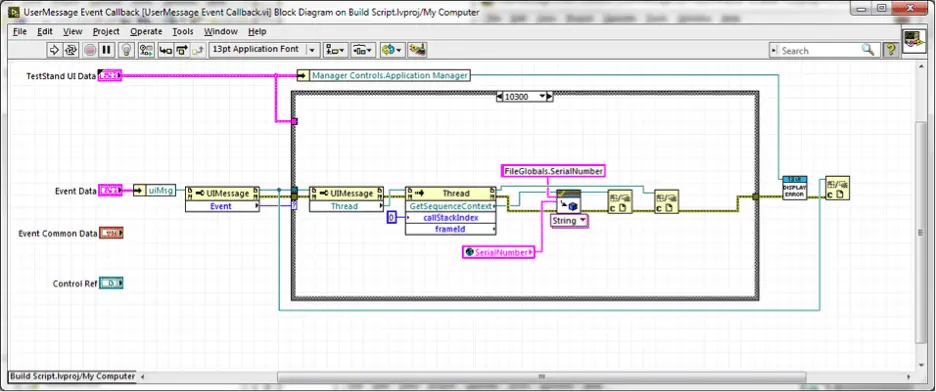
Another Status Message Example
To learn more about integrating UI Messages into TestStand, read our blog post “Custom Step Types in NI TestStand” or contact a Genuen engineer.


